Smart AI Home Tech in the Classroom: A Smart Light System Experience
Part of the Physical AI Lab Classroom Experience series, hands-on lessons that bring intelligent systems to life.
Explore a classroom-ready smart light system that responds to light, motion, and temperature.
Designed to work with the micro:bit devices and components you may already have in your classroom.
Grades: 4 to 8
Time: Flexible preview project + full lesson available
Focus: sensors, input, output, automation, smart systems
Tools: micro:bit, MakeCode simulator, optional LEDs, alligator clips, and sensors
Project Overview
Big Idea: Students build a smart light system that uses sensor input to trigger an automated output.
In this classroom-ready project, students build a smart light system using a micro:bit. They explore how sensors collect data, how code makes decisions, and how devices respond automatically. Students can begin in the MakeCode simulator and, if materials are available, extend their work into a real physical computing build using LEDs and sensors.
Why This Matters for Students
Students often struggle to see how coding connects to the real world. Smart home technology makes that connection immediate and meaningful.
This gives students a concrete way to see how coding connects to the devices and systems they already know from everyday life.
Behind every smart device is a simple but powerful system:
- Sensors collect data
- Code makes decisions
- Devices respond in real time
This is the foundation of modern automation, and a clear entry point into how AI systems work.
Where AI Comes In
This is how AI begins.
In this project, students build rule-based systems using if/else logic. These systems follow specific instructions based on sensor input.
AI systems take this idea a step further. Instead of only following programmed rules, they can learn from data, recognize patterns, and make predictions.
This project gives students an accessible foundation for understanding how intelligent systems work.
Materials Needed
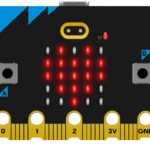
- micro:bit
- Battery pack or USB connection
- Optional alligator clips
- Optional LEDs
- Optional external sensors such as a PIR motion sensor
- Optional buzzer or speaker
How It Works
The micro:bit collects input from sensors and uses code to control outputs such as lights and sound. Students can build different versions of the same smart home idea depending on the sensors and outputs they choose.
 Option 1: Light-Activated System
Students use the micro:bit’s built-in light sensor to create an automatic lighting system.
- When it gets dark, the light turns on
- When it is bright, the light turns off
IF light level is below threshold
THEN turn light ON
ELSE turn light OFF
This is a simple and effective introduction to sensor-based decision making.
 Option 2: Motion-Activated System
Students use motion detection to trigger a response when movement is detected.
- When motion is detected, the light turns on
- After a short delay, the light turns off
IF motion is detected
THEN turn light ON
WAIT 3 seconds
TURN light OFF
This models real-world systems like automatic hallway or security lighting.
 Option 3: Temperature-Based System
Students use temperature data to trigger different outputs depending on changes in the environment.
- If temperature increases, show one response
- If temperature decreases, show a different response
IF temperature increases
THEN show icon A
ELSE IF temperature decreases
THEN show icon B
This introduces students to systems that respond to changing conditions over time.
Challenge Idea
Ask students to combine two conditions in one program. For example, can they make the light turn on only when it is dark and motion is detected?
From Code to Product: Adding 3D Design
If this were a real product, what would it look like?
Students can explore designs using the MakerWorld website and search for:
- micro:bit enclosures
- wall-mounted smart devices
- sensor housings
They can then evaluate which design best supports their system and how the device would be used in a real home or school.
Real-World Connections
Where This Exists in the Real World
These projects connect directly to real smart home systems such as automatic lighting, motion-activated security, and temperature-based controls. Students begin to see that modern devices rely on sensors, code, and thoughtful physical design.
Career Connections
- IoT Developer builds systems where sensors and devices communicate
- Electrical Engineer designs and tests hardware components
- Embedded Systems Programmer writes code that runs on physical devices
- Product Designer plans how a device looks and functions
Teaching Tip
You are not just coding. You are designing a product people could actually use.
This framing helps students connect code, hardware, and real-world problem solving.
Extension Idea
- Where would this device be used in a real home or school?
- What features would make it more useful?
- What design would make it easier to install or use?
Optional: Have students create a 3D-printed prototype of their design.
Take It to the Classroom
Part of the Physical AI Lab Classroom Experience series
Physical AI Lab Classroom Experience: Smart Light Systems
Teach this smart home light systems project with a complete classroom-ready package designed to save you planning time and help students connect sensors, code, and real-world design.
- Complete lesson plan with teacher guidance and pacing support
- Student worksheet
- Assessment Rubric
Designed to work with a BBC micro:bit Go kit.
Ready to teach it?
Get the complete lesson package
and teach this project with confidence.
Designed for educators using
their own micro:bit devices and components.
Closing Thought
When students combine sensors, code, and product design, coding becomes more than a classroom activity. It becomes a way to understand and create the smart systems shaping the real world.